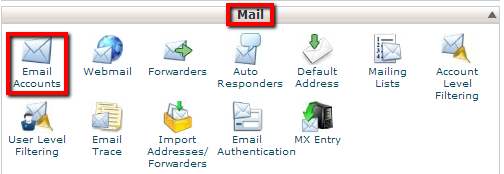
1. Log in to your control panel, go to the mail section and click on the email accounts icon.

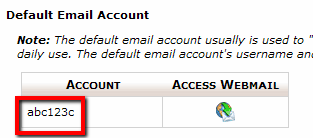
2. There is already a POP email account listed. It is the main POP account that every hosting account comes with. In this case, abc123c@abc123.com. But we are not going to use that POP account. We are going to create a new POP account.

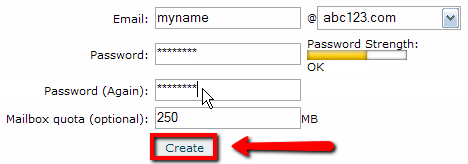
3. Enter the new email address for this POP account. If you have more than one domain in your account, be sure to choose the correct domain for which you want to create your POP email account. Then enter a password for this new account. You can set quota limit on this email account if you wish and when you are done, click the “create” button.

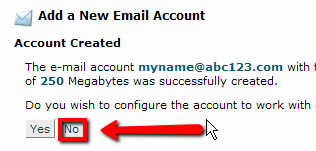
4. You will be directed to another page, and click ‘no’ below all the text.

5. And you are done! You can enter as many POP email accounts as your hosting plan allows. From here you can manage your POP email :
A: Check webmail
B: Delete the email account
C: Change the quota
D: Change the email password
E: Configure a mail client
